Cloud+ Agency Plan
You can sign up for the Cloud+ Agency Plan on the website here:
https://www.ccm19.de/ccm19-preise-reseller.html
With this plan, you can invite and manage clients yourself, book plans, and much more. We’ve outlined the process for the two different options here.
To book the plan, click the corresponding button in the pricing overview.
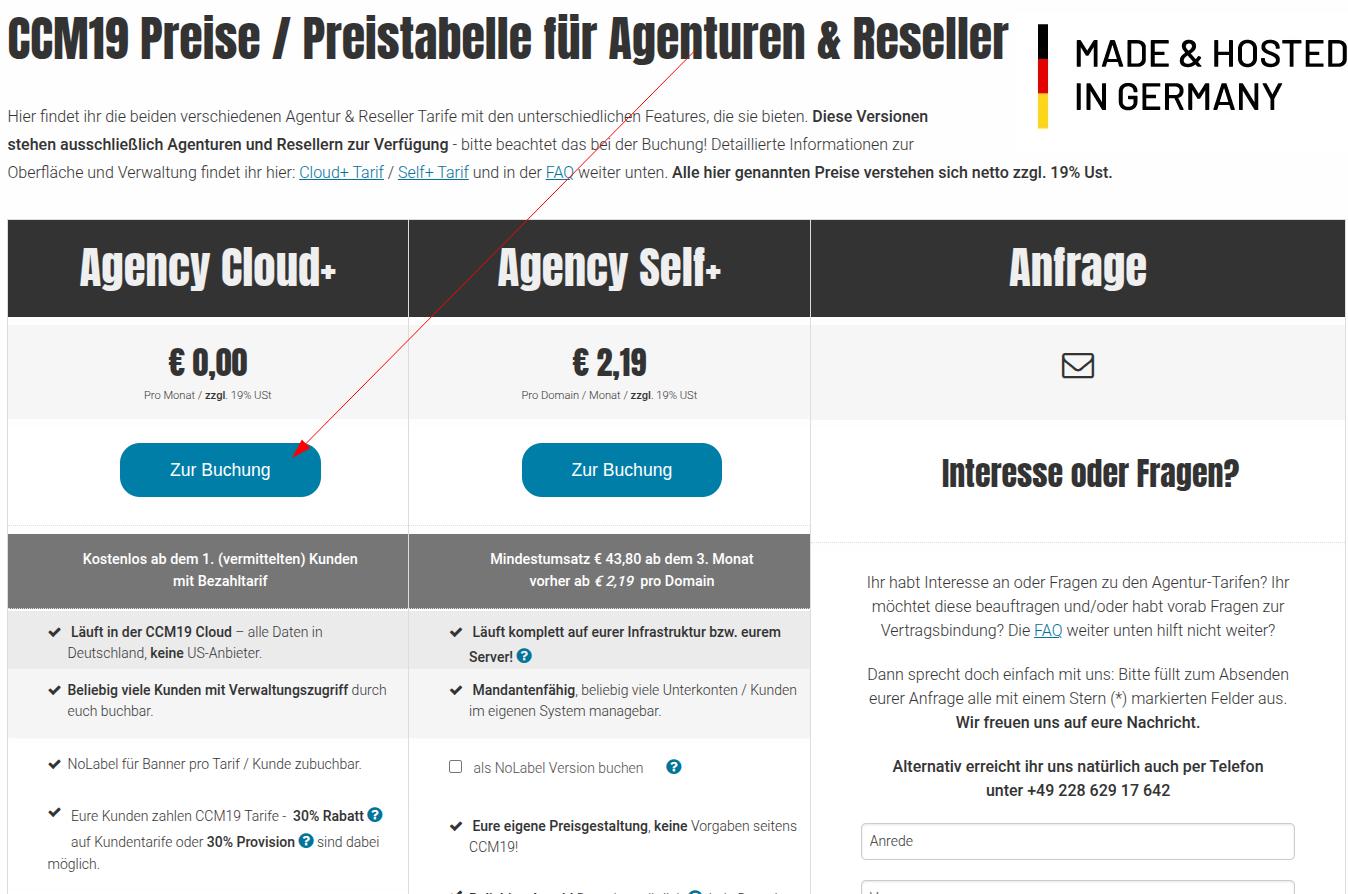
Now click through the shopping cart and the checkout process.
The only payment methods available here are “invoice” or “direct debit,” as payment options are constantly expanding depending on how the account is used. This is often difficult to manage with other payment methods.
To receive an affiliate-commission, you must sign up for it at the end of the checkout process.
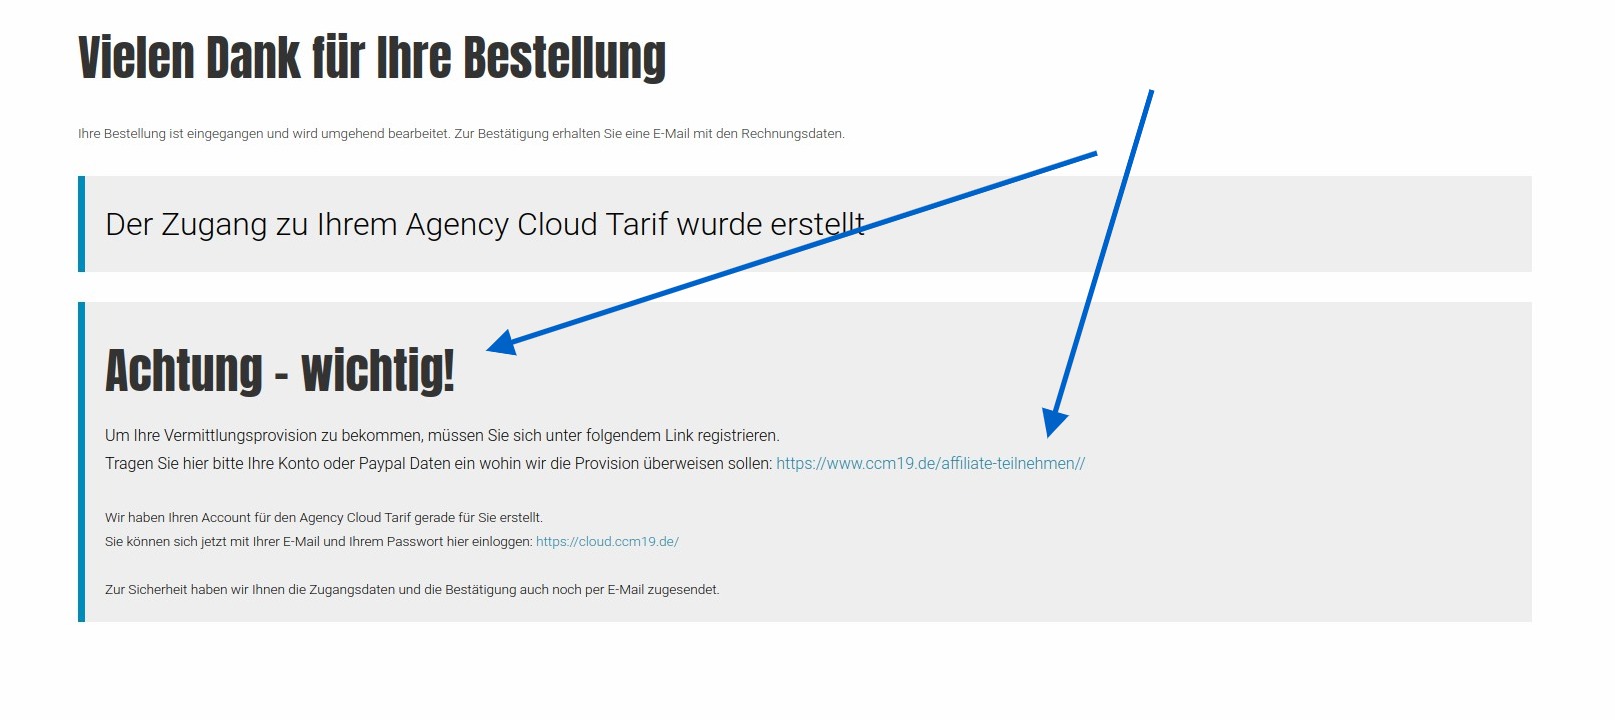
Click on the link and enter your account information on the following page so we know where to transfer the outstanding amounts./u/0/search-console/performance/search-analytics?resource_id=sc-domain%3Accm19.de
Invite Customers via E-Mail (Commission Model)
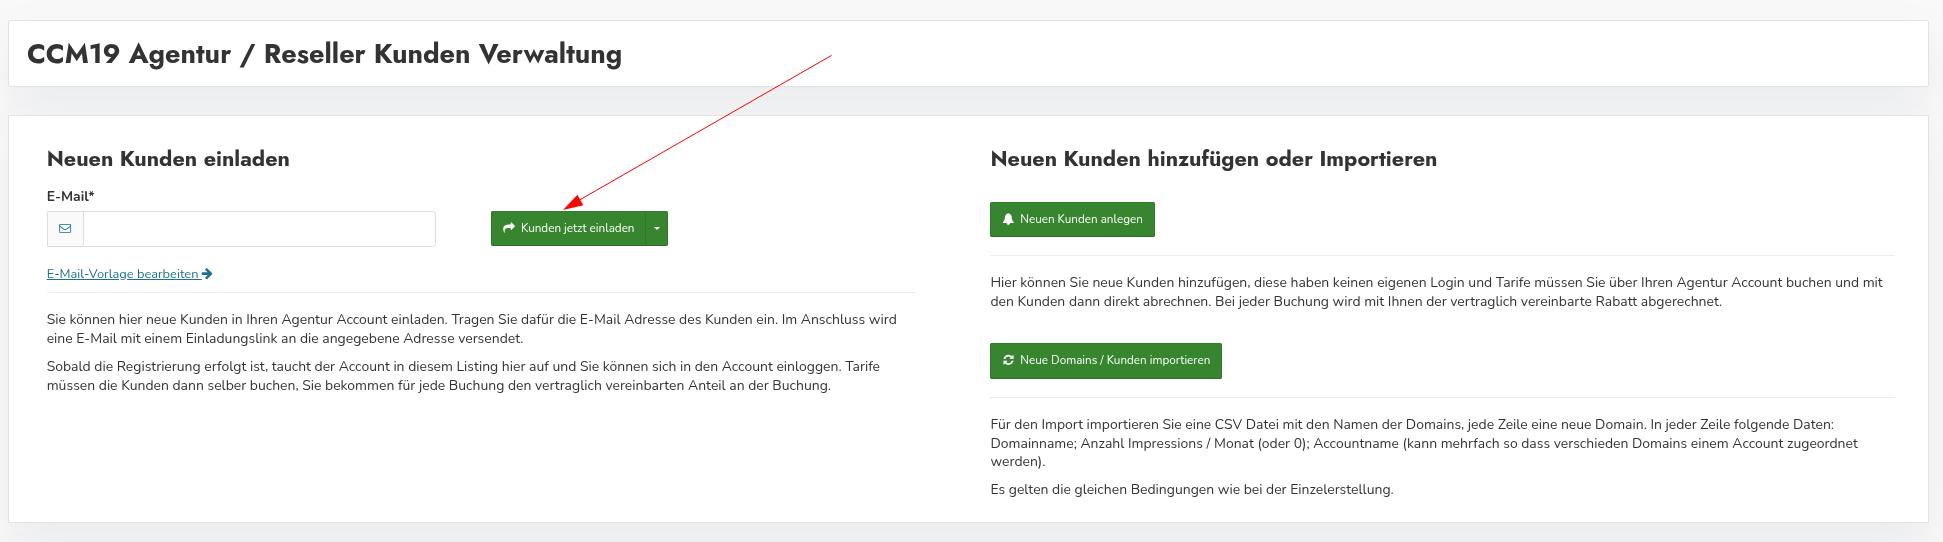
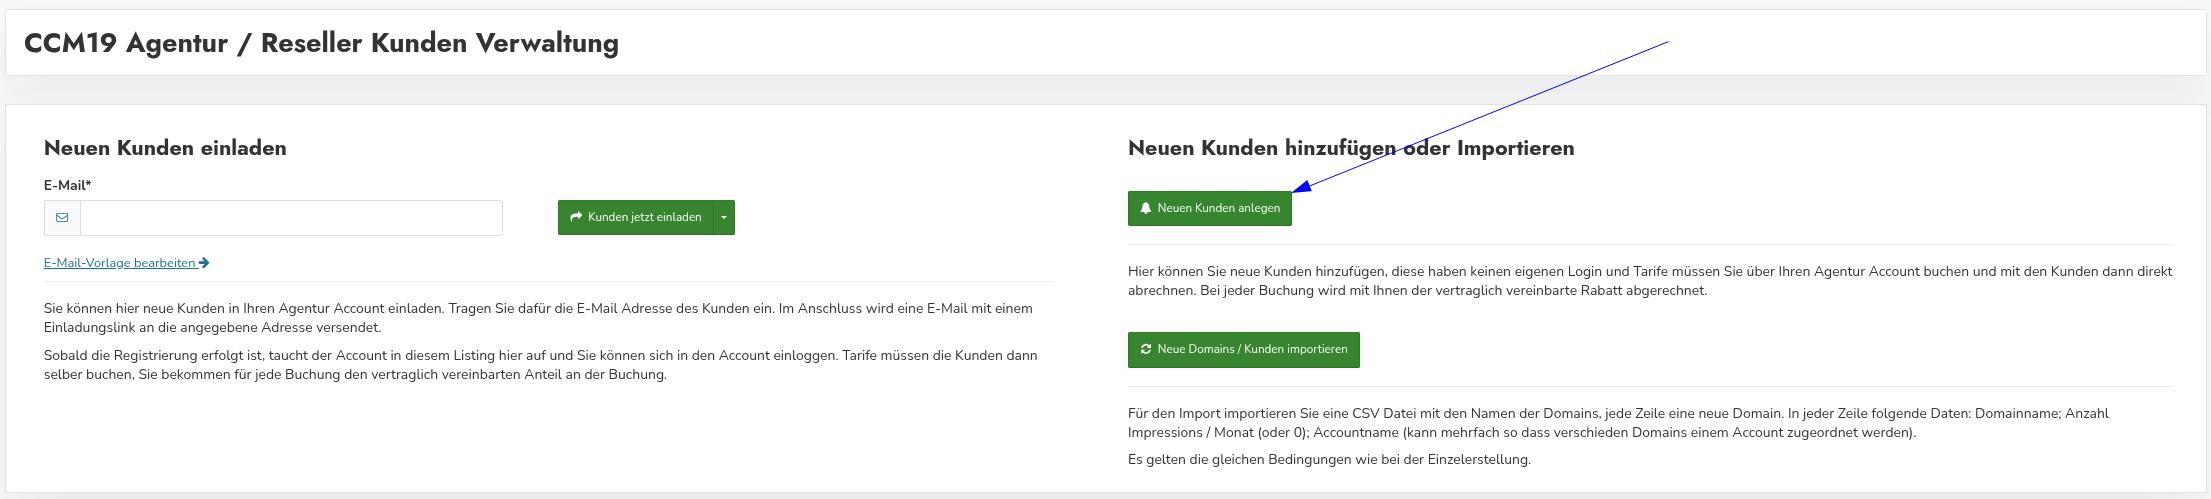
Via“Invite New Customers” , you can send an invitation via e-mail. The invited person receives an invitation link and can then create their own CCM19-account.
This option is particularly suitable if you want your customer to have their own login and manage their CCM19-account independently.
In this case, billing is handled directly through the customer’s account. The customer selects the appropriate CCM19-plan themselves and receives the invoice directly from CCM19.
For every account set up through your invitation, you, as an agency, will receive a30% commission . Commissions are settled quarterly in accordance with the commission agreement.
To set this up for customers, send them an invitation link. To do so, enter the customer’s email address-in the field.
You can edit the text of the email by clicking the link above labeled “Edit-Email Template.”

It is important that the entry#inviteLink# is retained, as this is where the link is generated that allows potential customers to be assigned to you—which won’t work without this link.
After you’ve sent the invitation, the invitations will appear in the list below.

Here, you can resend the invitations by clicking the green button. Please note that you can only send the invitation 4 times. Clicking the red button deletes the invitations.
Once the invitations have been accepted, the status will show as "accepted."
Accept Invitation
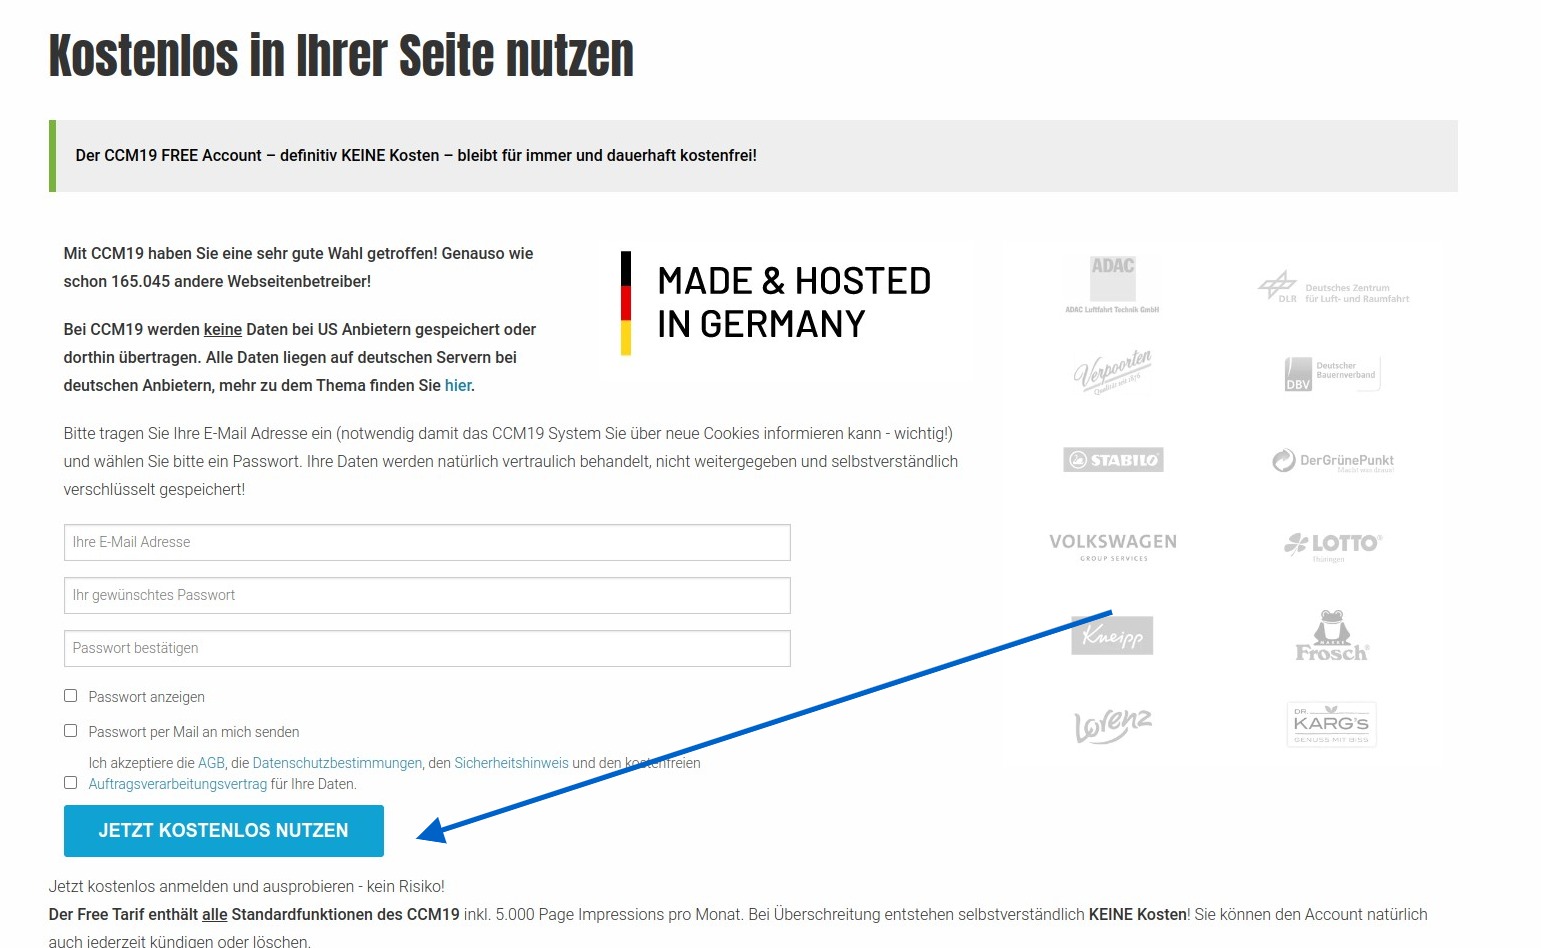
When potential customers click the link, they’ll be taken directly to the sign-up form for the Free plan.
Once your customers have signed up there, you can book new and upgraded plans either through the standard booking form on the website or via the administration panel in CCM19.
You can also book these plans for your customers, but to do so, you must log in to the customer account
Logging into the Customer Account
To ensure your customers don’t have to share their passwords with you, as their managing agency, you have the option to access the accounts without logging in. Of course, this only works for accounts assigned to you, which are visible in the list within the plugin.
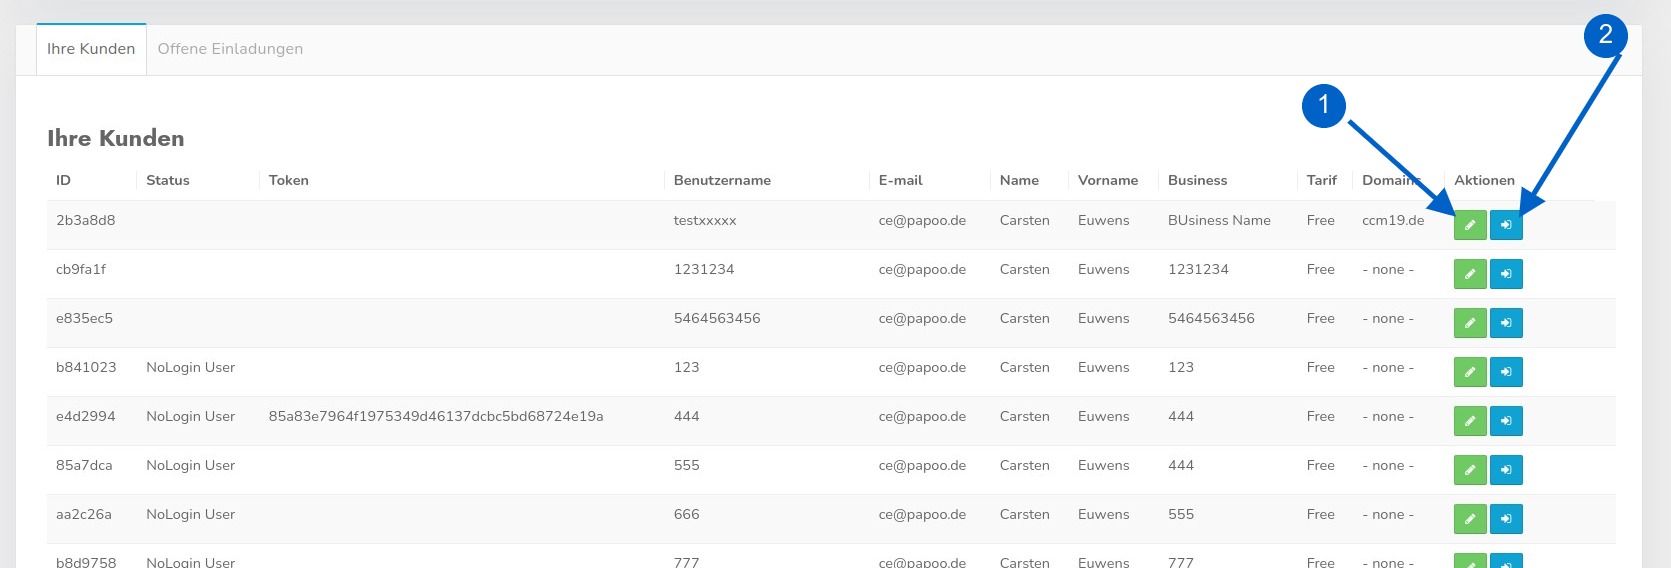
By clicking button No. 2, you can log in to your client’s accountwithout logging inand act freely there. We assume that you will, of course, use this feature responsibly—otherwise, accounts will be deleted.
From there, you can also purchase a plan for your clients, enter domains and embeddings/cookies, scan the site, and much more.
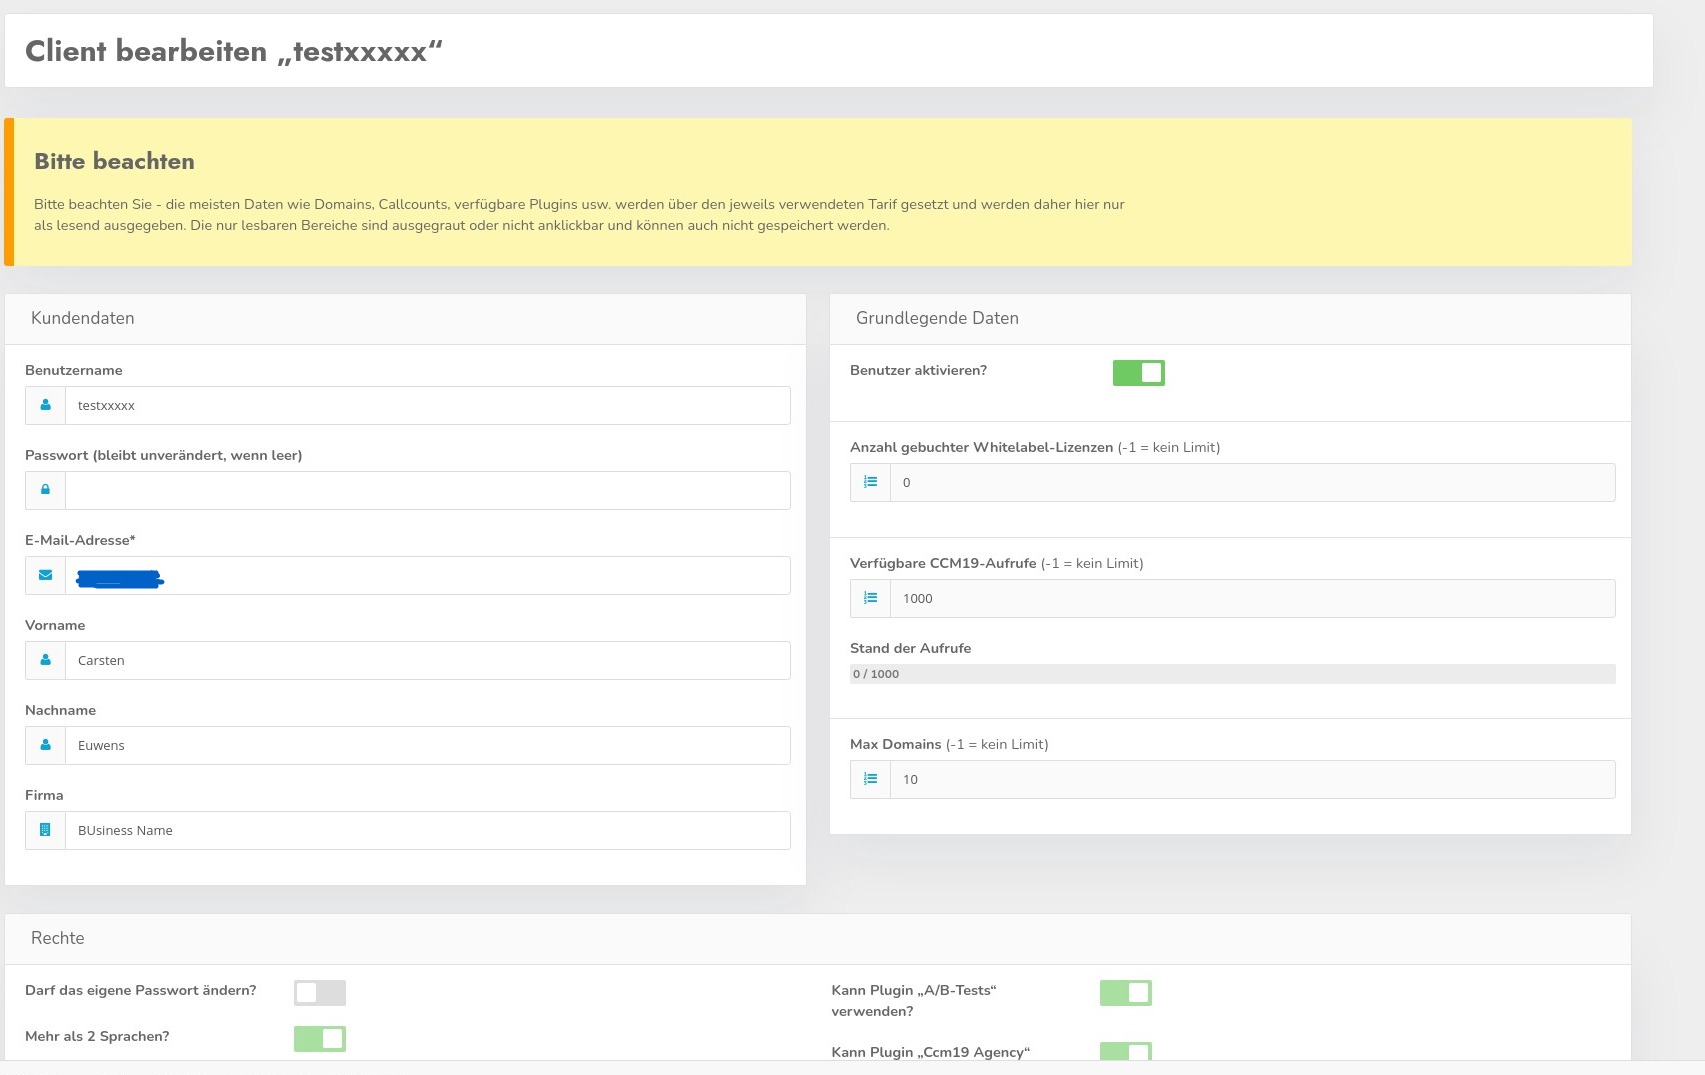
Clicking Button No. 1 takes you to the editing screen, where you can change a few details. Most functions are controlled and enabled by your customer’s selected plan.
You cannot delete accounts here; deletion must be initiated from within the accounts themselves via the standard cancellation process.
Create a Customer Account Directly (Billing Model)
Alternatively, you can create a customer account yourself via“Add or Import New Customer” . This is particularly useful if you want to handle the setup and administration entirely on behalf of your customer.
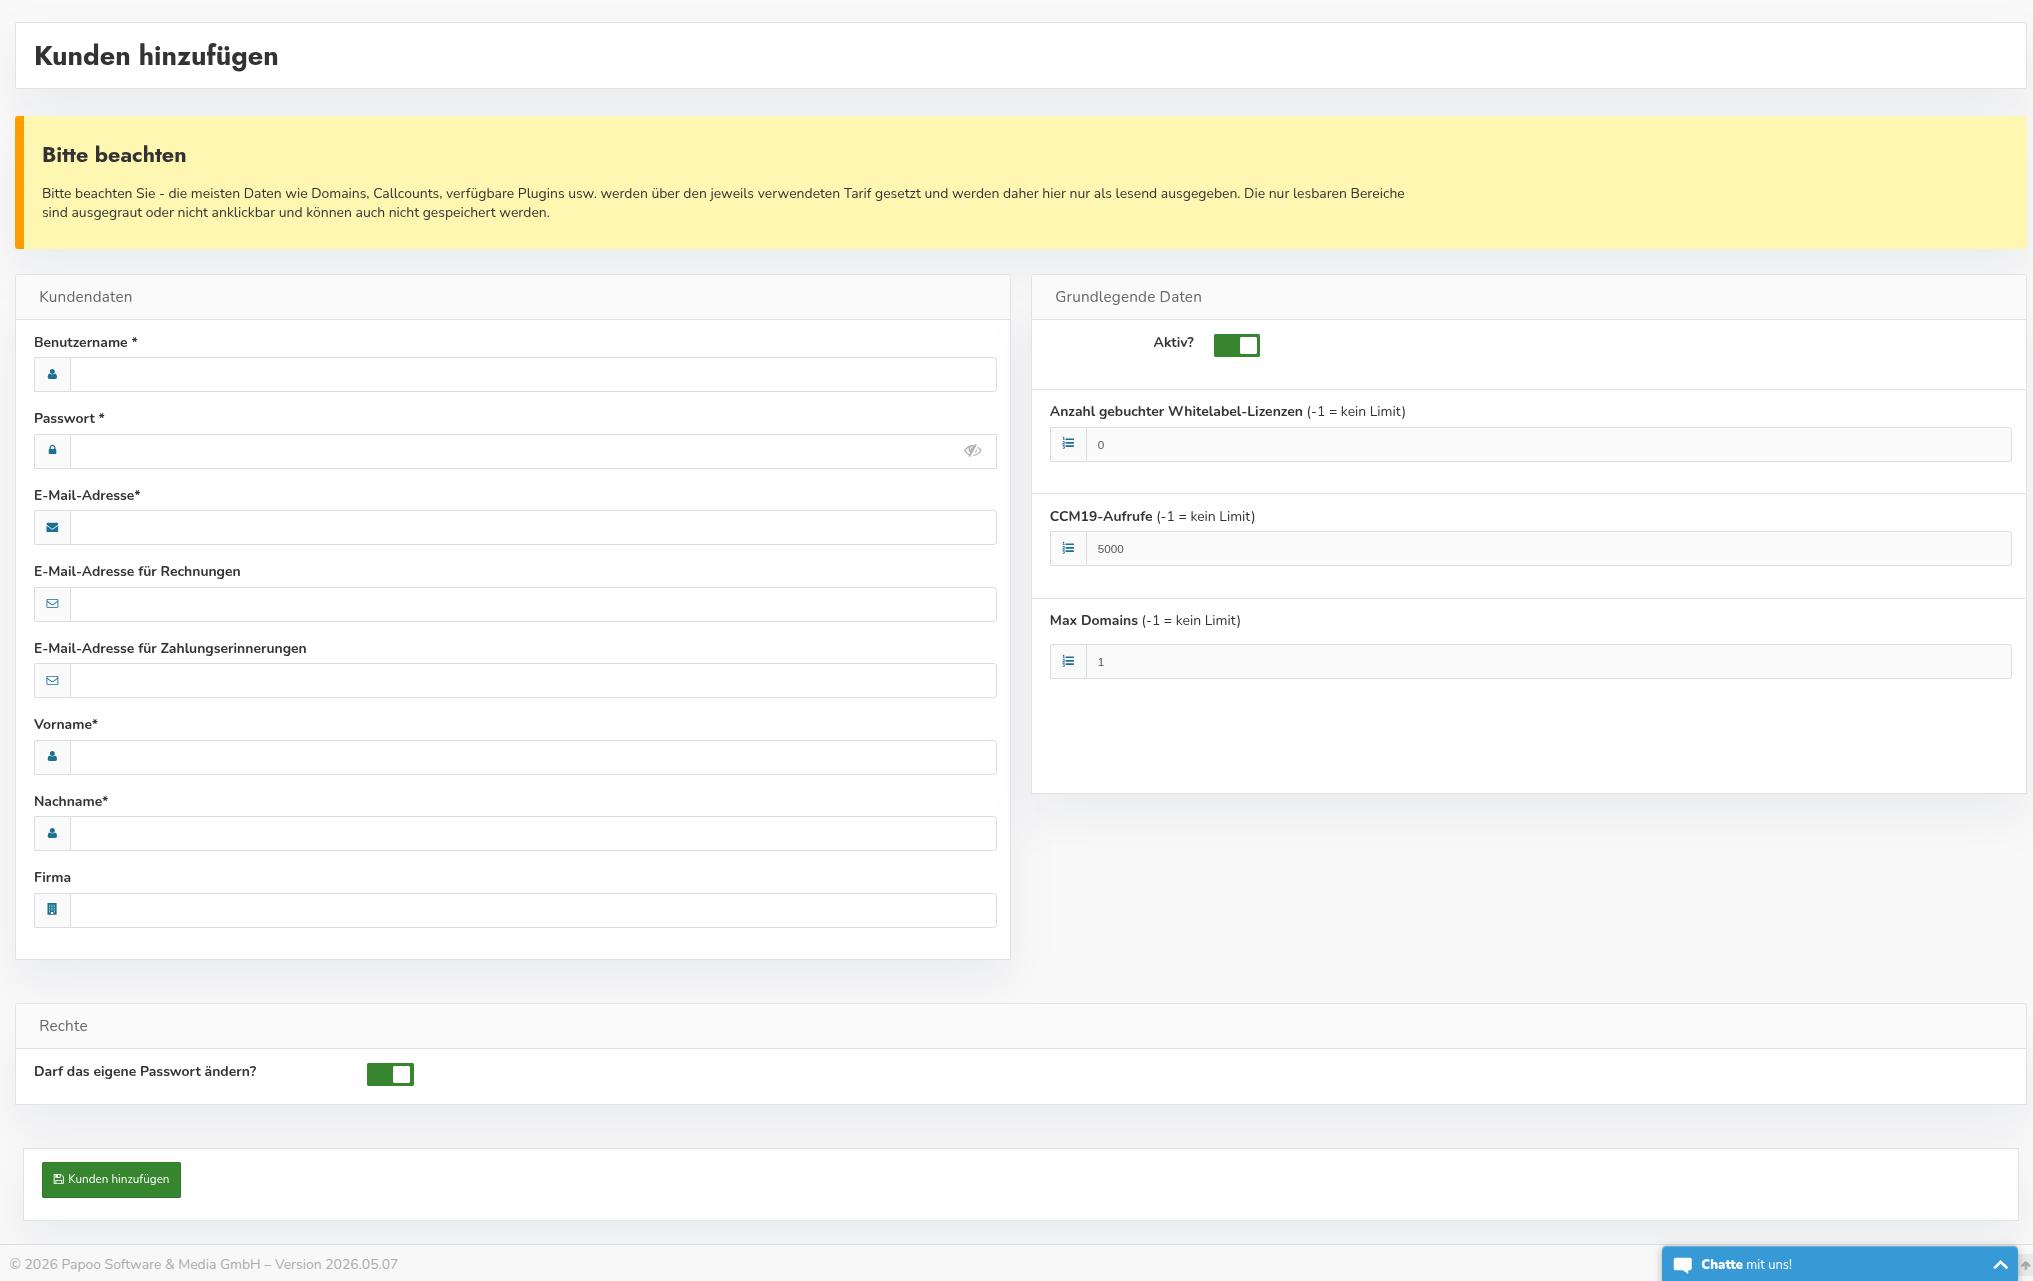
After clicking, the input form for customer data will open. There, enter the required information, such as username, password, e-mail-address, and address details.
After saving, the customer account will be assigned to your agency administration.
Note: The input form may still display an option to change your own password. For customer accounts created directly, this setting is not relevant, as access is granted via the agency-account.

You can then continue setting up the account, for example, by adding domains, selecting the appropriate plan, or configuring cookies-and banners-.
For customer accounts created directly, access is provided through your agency-account. A separate login by the customer is not provided for in this case.
Select a Plan for Directly Created Customer Accounts
When you create a customer account directly, you select the appropriate plan for your customer.
In this case, the invoice will be issued to you and sent to you. In return, you’ll receive a30% agency discounton every booking.
You handle further billing to your client as part of your own agency services. This allows you to integrate the CCM19-plan into your own service offering, along with setup, management, or ongoing support, among other services.